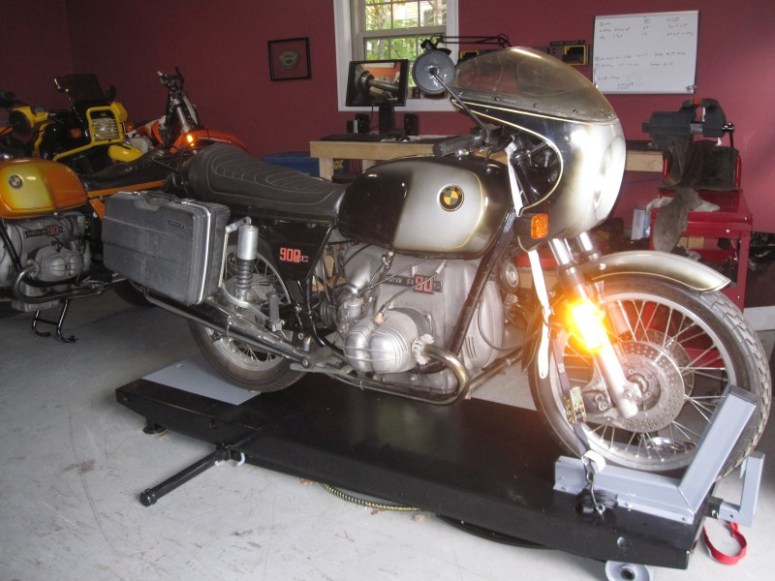
OK. We have the bike in the garage now. It is time to give it a good visual “once-over” to get an idea about how involved the process will be to get it started and running. Certain issues need to be addressed right away, others are more minor and can wait until the bike is in running condition. If you’re lucky enough to have a lift, then Step 1 is to get it on the lift. It really makes for easier times for just about everything else. If you don’t, well, that’s OK, just find a comfy spot and prop it up on the centerstand. A small stool is helpful, but if you’re really slummin’ it, an upside down bucket will do…
Time to confirm that serial numbers match…


They do ! Looks like this one has a build date of Sept 1974, USA model. There are BMW motorcycle VIN decoders that can be found on the web. Just input the VIN and out comes the model and the build month.
What I usually do at this point is remove luggage and give the major components a visual inspection to see what will need further attention prior to attempting to get the bike running. I generally start by the top and work my way down. Here are my findings on this particular bike
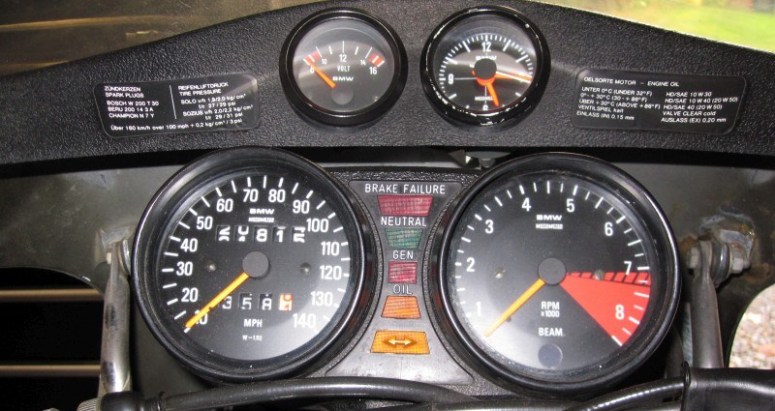
Nice original clock and voltmeter. Odometer appears to be rolling between 20 and 21 thousand miles before the hundreds reach 9. This may be an issue (non-urgent)
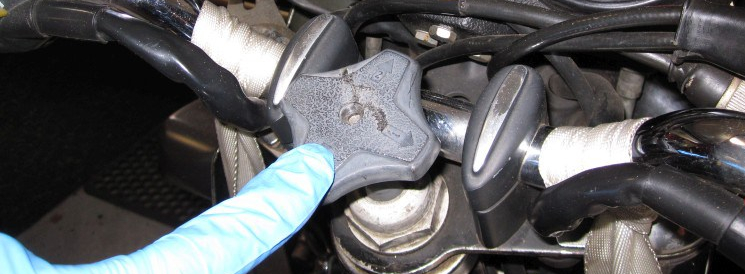
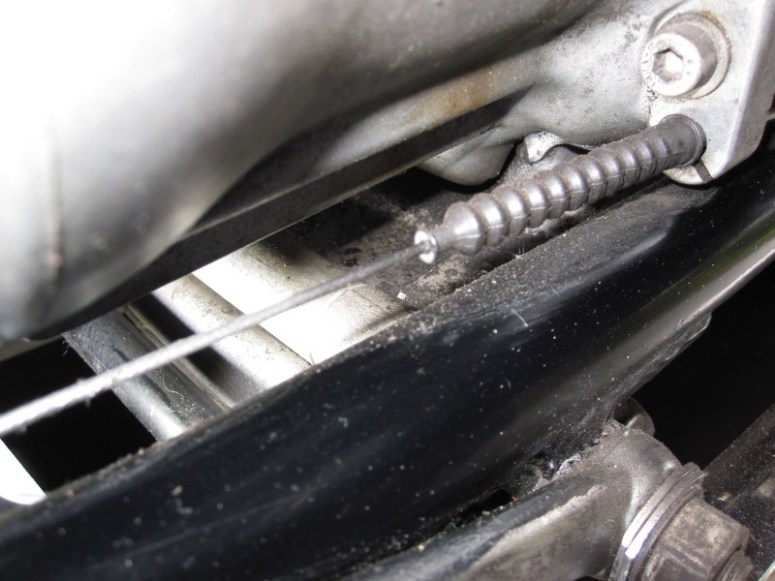
Steering damper knob is cracked and is missing the plastic seal that fits in the steering stem nut. Also the screw is missing. No big deal here so far.

switchgear and levers appear to function. Old handgrips, quite worn. The throttle is stuck. This is more serious and will need to be addressed very soon. Can’t start a bike that doesn’t have a working throttle!
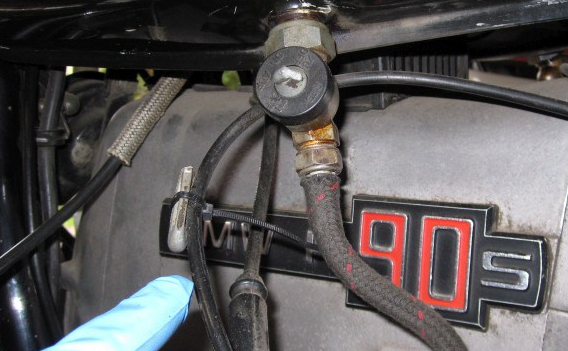
Next is the gas tank. I was quite chagrined to hear some 20-year-old gas sloshing around in there. one of the petcock handles was broken off but tie-wrapped to the choke cable 🙂 how useful… Gas in the tank is a more major issue. Action must be taken now.

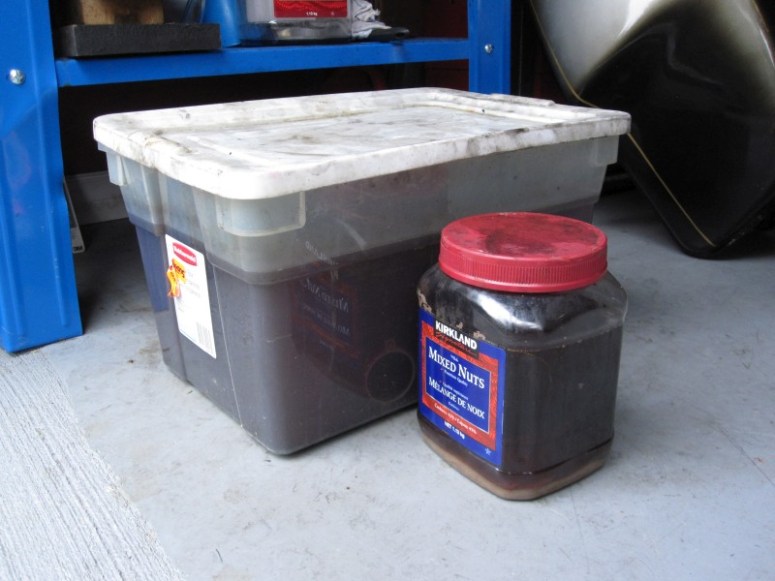
Time to drain the tank. There wasn’t much in there, but enough to make me worry about the liner’s condition…

Right sided petcock was obviously leaking… Gas lines were tuned into soft mush on the right side…

… and hard and brittle on the left. They will need to be replaced Right away too.

A pair of vice grips made away with the broken petcock
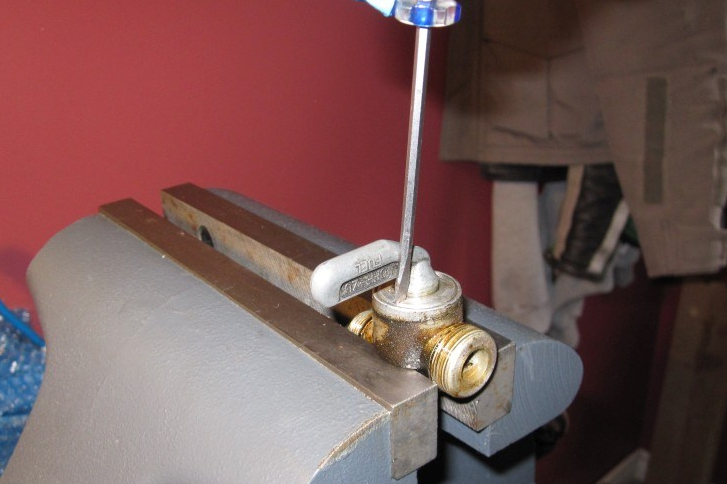
Here’s a trick I use to take the petcocks apart. the backing plate has a couple of slots and it can sometimes be difficult to unscrew it. I set the petcock in a vice, then I just take a small screwdriver then wedge it between the groove and the petcock handle, then turn on the petcock handle to give it spinning leverage, and presto…

the tap comes off easily. No fuss, no muss…
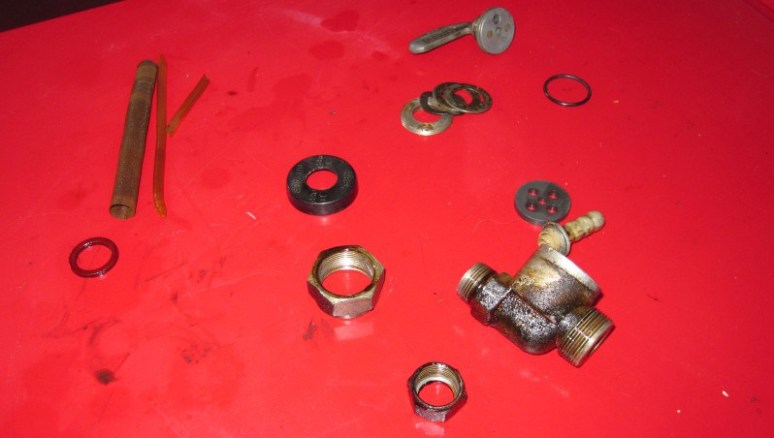
Once apart, the metal bits will need cleaning and the rubber bits will need replacing. The old-type screen filter will be replaced with it’s modern upgraded part that has a built-in compression washer.

I use a cheap ultrasonic cleaner, but an overnight in a container full of diluted PineSol (50:50 with water) does a good job as well. Careful not to leave the parts in there too long, as the acid will eat away at them…
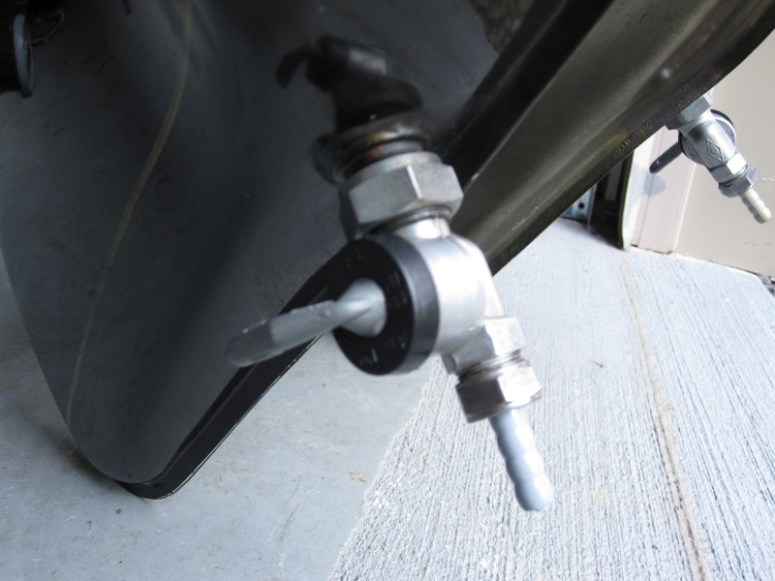
Here are the petcocks cleaned and rebuilt

Thankfully the liner in the tank appears to be in good shape. Bullet dodged !
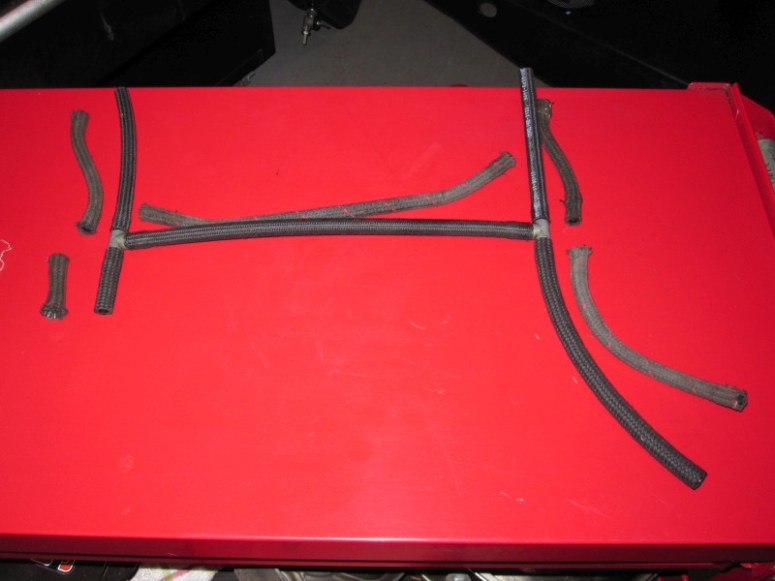
Here’s a pic of the newly assembled fuel lines. I simply cut approximate lengths of new fuel line to match the old rotten ones and inserted them in the “T”‘s
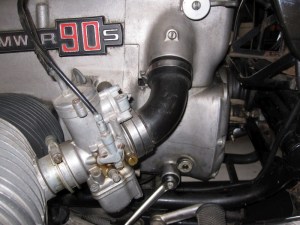
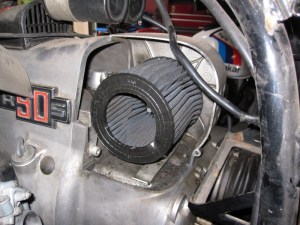
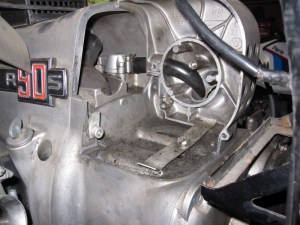
Next the air filter gets inspected. Removed the carburetor tubes (rubber very hard and cracked on the joining rubber pieces, 2 out of the 4 will need to be replaced. the air filter is a K&N. Some people like them, some don’t. I’m one of the ones that don’t. Will order a replacement BMW filter. Once the filter removed I can get a view of the starter motor, which appears to be an original Bosch unit.
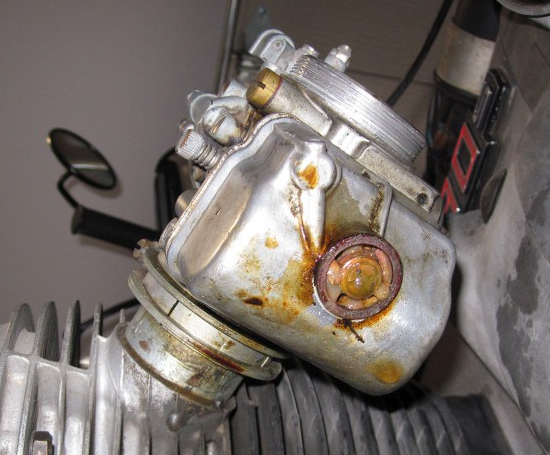
Time to move to the next item in fuel delivery and drop the carburetor float bowls. They were very hard to take off, like something was keeping them in place… Oh my.
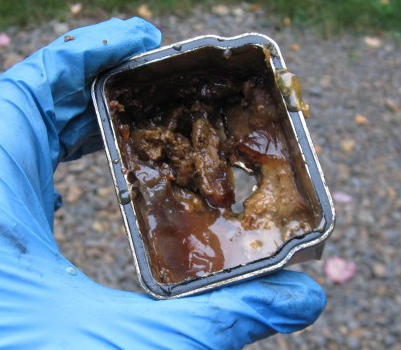
… So this is what 20-year-old gas turns into…

This is not good
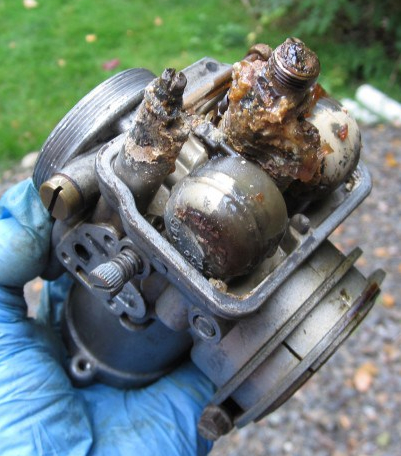
All the jets and brass pieces were in a pretty sad state. I took as much of the gunk as I could then put everything in a nice PineSol (50:50 with water) mixture for a couple of hours.
After a couple of hours, I brushed off as much gunk as I could then disassembled the carbs, being extra-careful to not mix up left side and right side parts and returned all the parts to a PineSol bath overnight.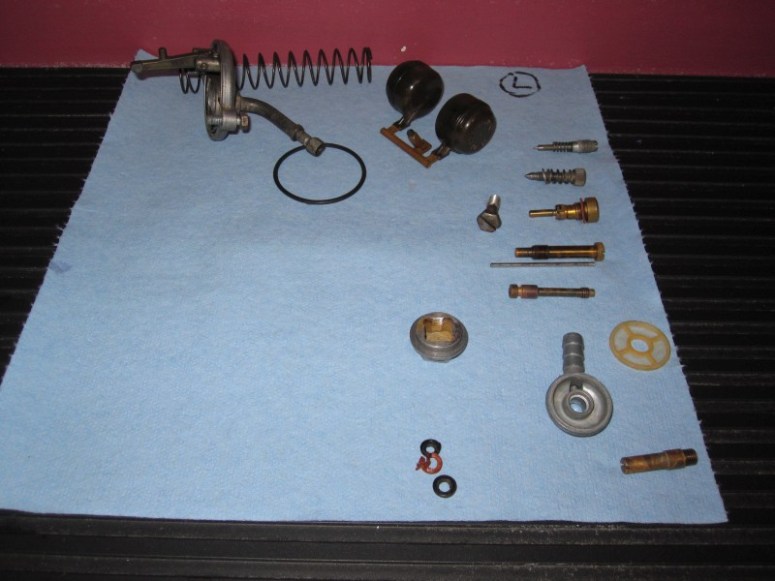
All the rubber and paper gaskets will not be re-useable. However the floats cleaned up fairly nicely and the float needle doesn’t look too bad. These are some of the small parts after a PineSol bath. Notice the letter “L” on the paper towel. Best not to let the Left and Right worlds collide !

The right sided carburetor came out looking pretty good after the cleanup. Notice the good job some PineSol followed by very gentle application of a brass brush cleaned up the various jets in the background of the picture above. It is very important to clean out the small passages in all the jets and to be sure the one-way valve is working. This took over an hour with various pieces of fishing line, soft wire and brushes. However…
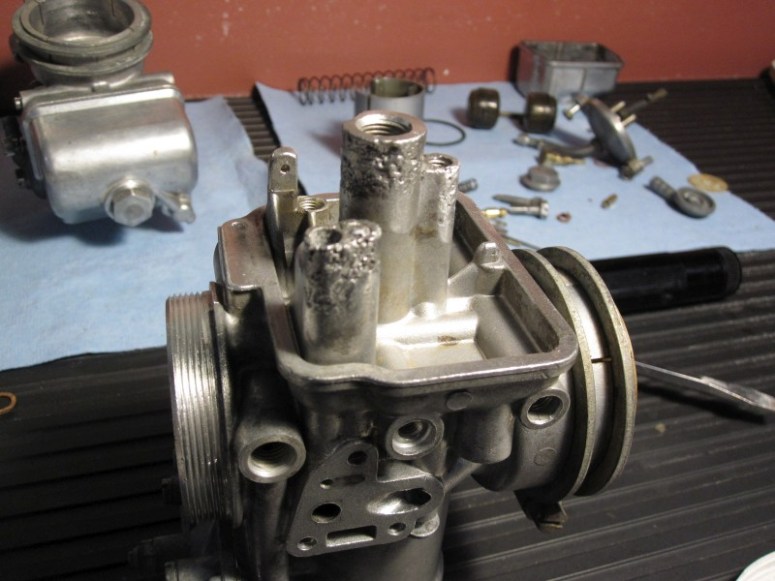
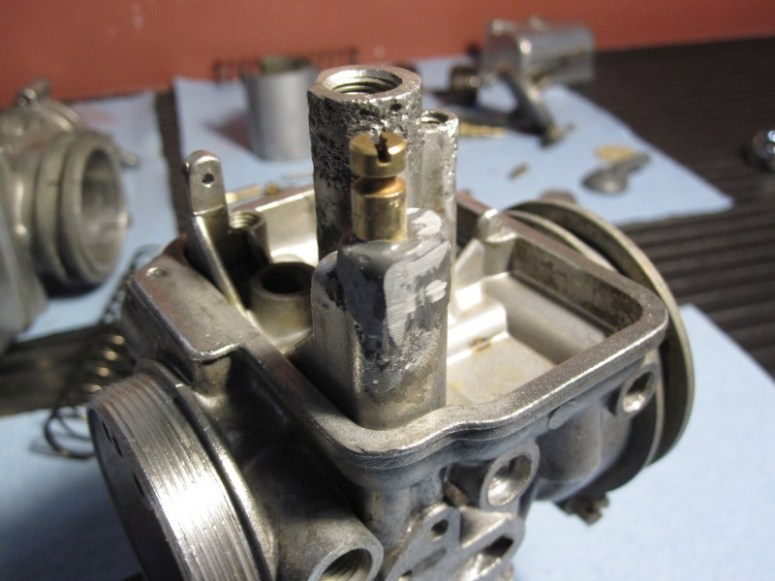
… the left side was a different story. the corrosion had eaten away at the aluminium body of the carb. This is what it looked like after a good clean-up with a brass wire wheel.
The main issue here is where the starter jet attaches to the body of the carb. The corrosion ate away enough to cause a visible gap where things should be airtight.
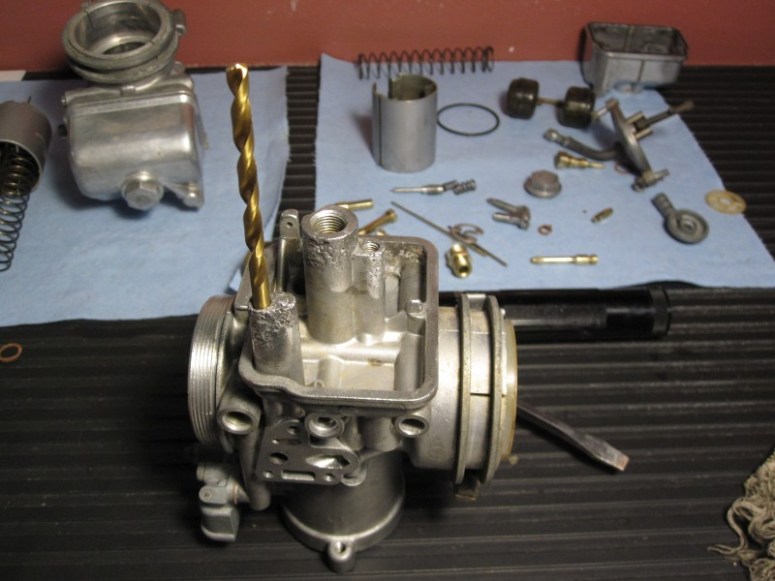
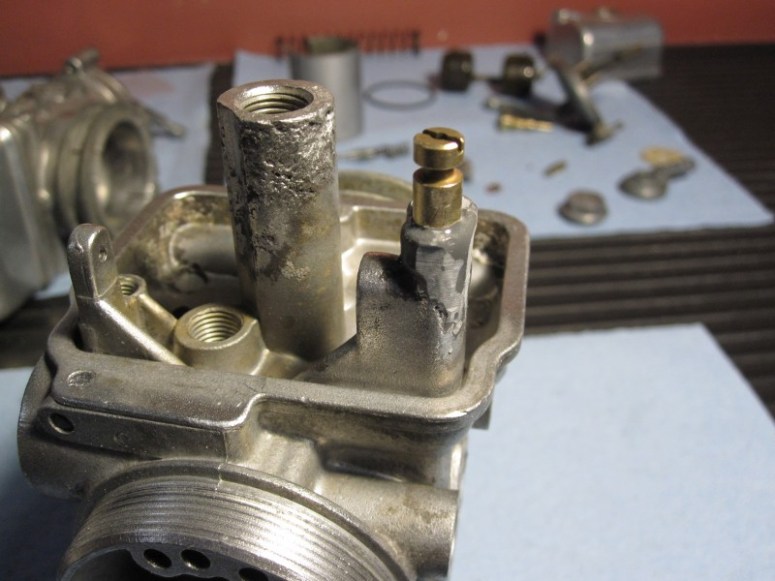
Here I’ve inserted a drill bit to seal the hole and then I proceeded to use some JB Weld to cover up the defects. Once hardened I was able to file it down and get the jet to seal. It’s not ideal, but as far as I can tell, it’s the only critical defect in the carb and if it works, it will save buying a replacement carb.
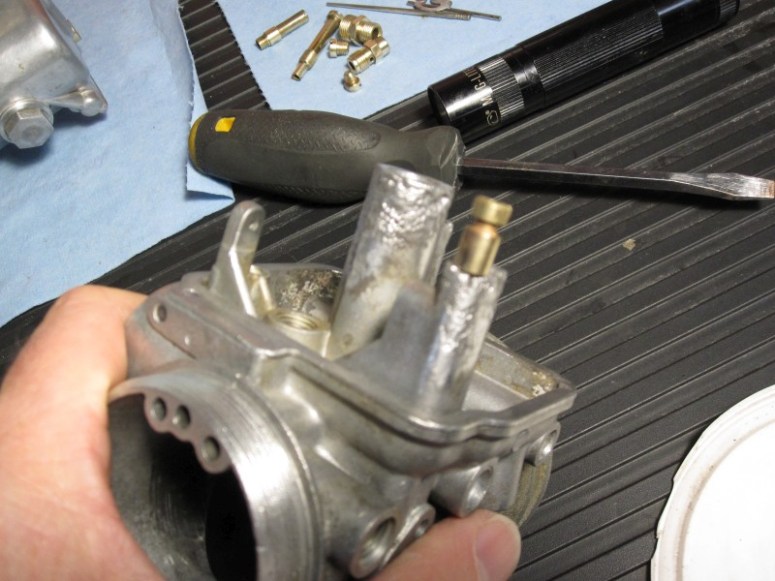
Here’s the result. The JB Weld has been filed down to let it fit in the bowl. The nice thing about it is it’s resistant to gasoline and easy to work with. It may not be pretty, but we’ll keep our fingers crossed.
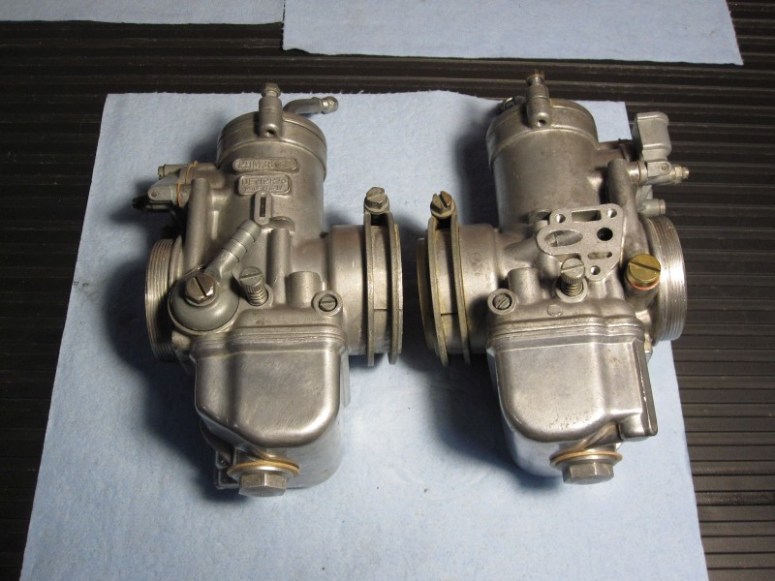
All the seals and gaskets were replaced and the carbs re-assembled. Ready for action !
Onwards with the inspection! The seat cover has a few scratches and a small tear on the back part of it. New seat cover will be ordered. 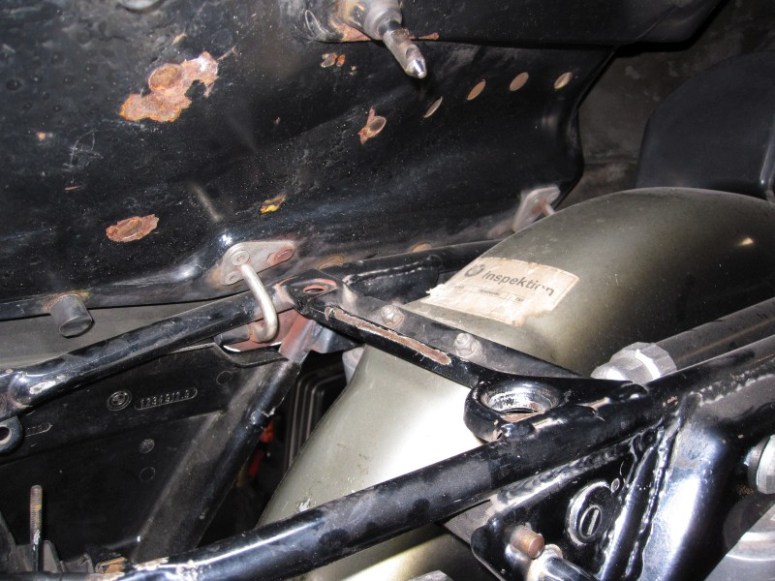
The underside of the seat pan is a little rusty. This falls in the “later” category.
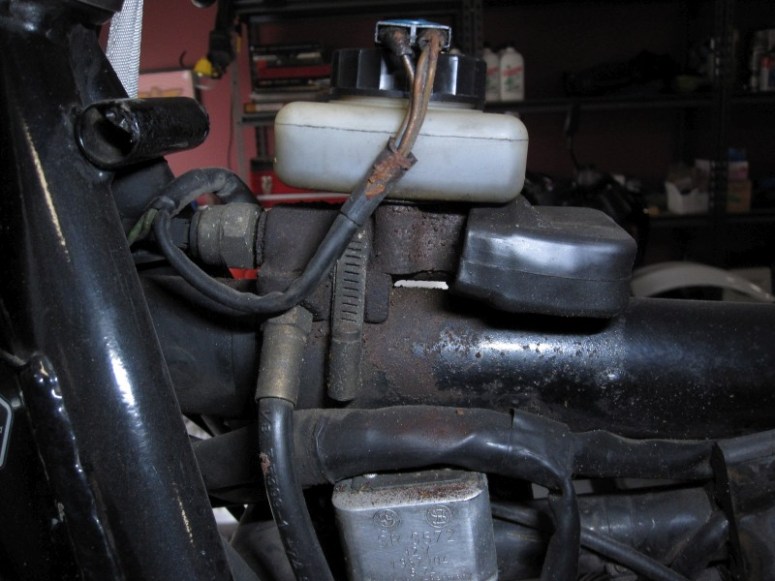
The under-tank master cylinder has been leaking brake fluid. This is common occurrence on these bikes and will require removal and rebuilding of the master cylinder and some sanding and repainting of that part of the frame. This is also a “later” type of issue.
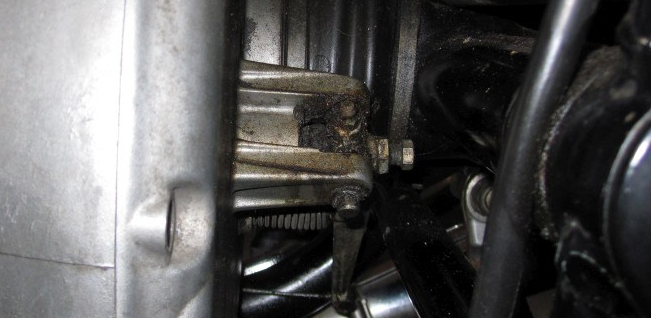
some oily weeping at the back of the clutch pushrod. no real leaking but just some seepage. Nothing serious. Will clean that up and see where it is accumulating from once the bike is running.
Some signs of right sided pushrod tube seal leakage, cylinder base gasket weeping as well. Again nothing urgent, just making a mental note of this. Will likely clean it up later and see how much this is weeping.
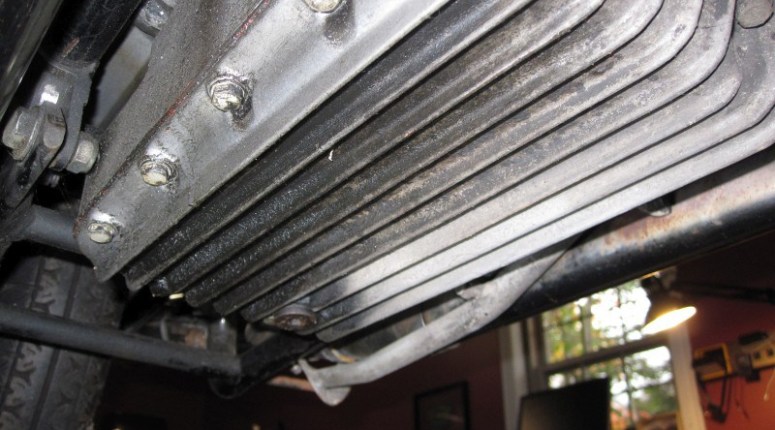
Under the oilpan is some oil that leaked from the right side of the motor, suspecting pushrod tube seals as the culprit.

Now moving towards the back of the bike
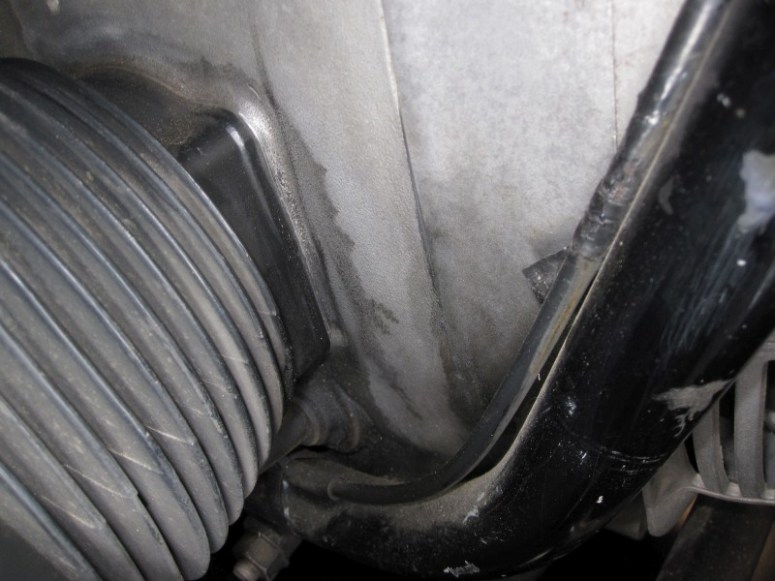
This area under the transmission is called the “shelf” When oil accumulates here, it can mean that the rear main seal requires replacing. By looking on this bike, the shelf is dirty, but not clearly oily. This will be another issue to keep an eye on once the bike on the road.
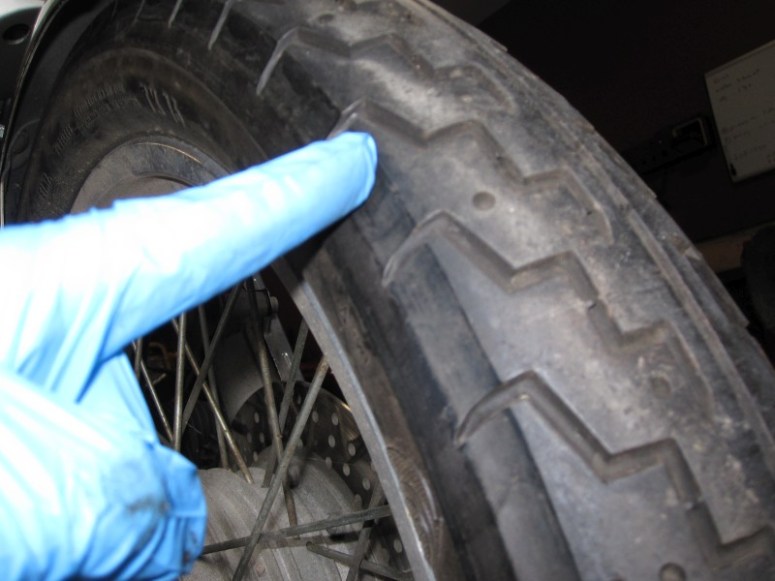
The front tire had a bizarre groove worn on it on the right side. It kind of looks like it was rubbing on the inner fender brace. Closer inspection reveals that the tire mounted is a 110 (metric) width as opposed to a 3.25-19 tire. I’m hoping that this was the cause, but will find out once I have the proper tires mounted to the wheels. That 20-year-old rubber is cracked and has a hard plasticky feeling to it !
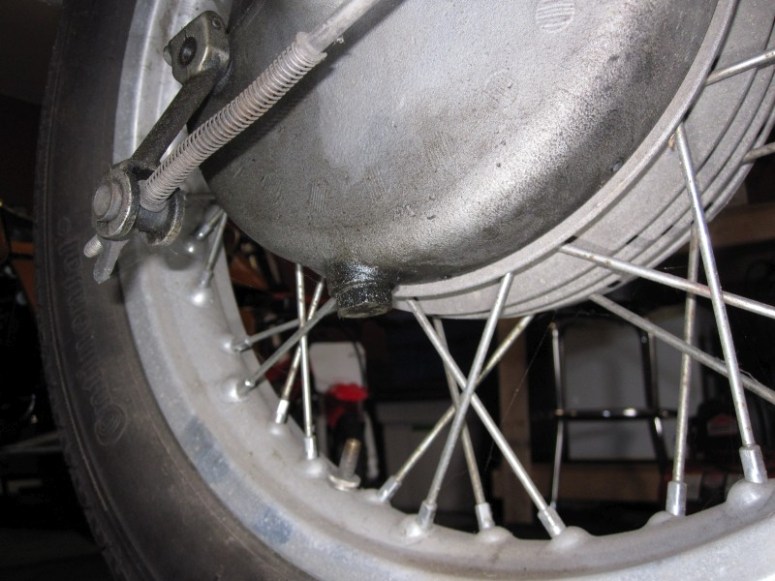
Another (non-urgent) issue is the leaky rear drive. It will likely need some new seals and gaskets, but again, not really urgent. Will clean this up and see from where it is leaking once it’s on the road. Might just be overfilled and leaking from the vent ? wishful thinking…
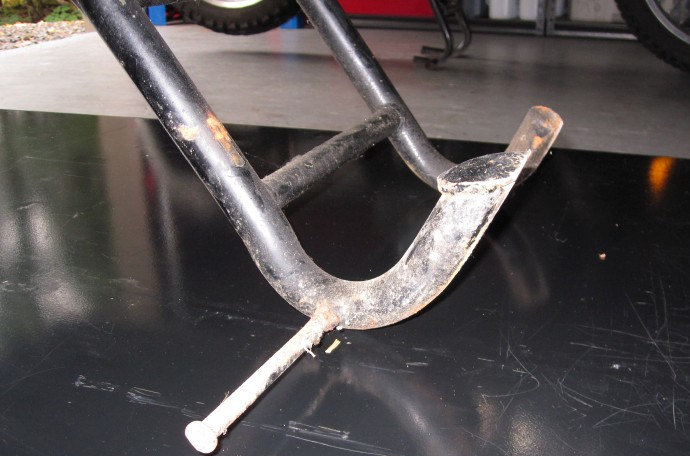
Centerstand will also require some cleaning and repainting at a later date.
The last step for inspection is to connect a charged battery. Here is the one I had ordered in advance

Time for a quick inspection of the electrical functions of the bike, excluding the starting circuit; we will save that one for later once we’ve established that there is oil where there should be oil and the motor is not “stuck”.
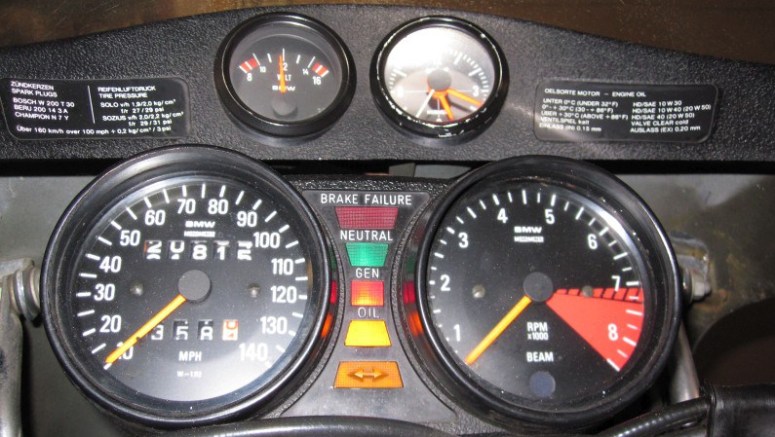
Turn on the key, Voltmeter check! clock works check! idiot lights check! High beam check! Low beam check! tail lights check! brake lights check! horn check!
Looks like the electrical system is an initial “pass” ! Time to disconnect the battery again, as soon we will be removing the alternator cover and we don’t want to short out the diode board.
So there you have it. The inspection is done and we’ve corrected 3 critical problems (petcocks, fuel lines and carburetors) that would prevent the bike from starting. We have also identified several other issues to be addressed at a later date. The only “semi-critical” issue is the tires, which will need replacing before taking the bike on the road.
